Bexio Web Debtor Extension
How to use the Bexio Web Debtor Extension
Operating mode
Modules
Invoicing
The Bexio Web Debtor Extension allows you to post and cancel invoices, transfer addresses and import payments with Bexio Online Accounting.
Installing the extension
In Vertec, go to Settings > Interfaces > Extensions folder and open the Bexio Web Debtor Extension. Click Install.
Configuring Bexio
Generate API token
Under Settings > All settings > Apps & API, select the API keys. An API token for Vertec can be generated or copied:

Deactivate automatic invoice number
In order for Vertec to write the invoice number in Bexio, go to Settings > All settings > Functions and modules > Invoice and remove the checkmark for Assign number automatically :

Create a downpayment account
In Bexio, invoice items cannot be posted to asset or liability accounts. To circumvent this problem, a downpayment account is defined as an income or expenditure account:

System settings in Vertec
Some system settings are installed for all debtor extensions. These are listed in System settings > Accounting.
The following system settings are specific to the Bexio Web Debtor Extension:
Bexio access tokenInsert here the API token that you generated in Bexio. PropertyName: |
Bexio cancellation method
PropertyName: |
Bexio URL for Web ServiceEnter here the URL to the Bexio web service, usually PropertyName: |
Downpayment accountEnter here the downpayment account that you have created in Bexio. PropertyName: |
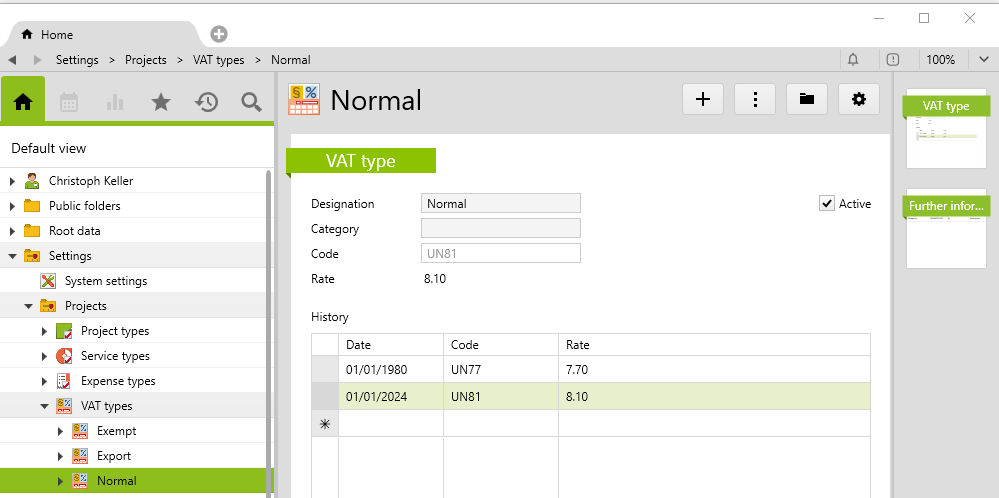
Configure VAT types
For the VAT types, you must configure the relevant code from Bexio, e.g. UN81:
Payment terms
The payment terms saved in Vertec result in a due date on the invoice. This due date is transferred to Bexio when posting.
Setting up multiple clients
The Vertec Bexio Web Debtor Extension is multi-client. To set up multiple clients, create a project type in Vertec for each additional client
On the project type, Further information page, you can define the API token of the Bexio client:
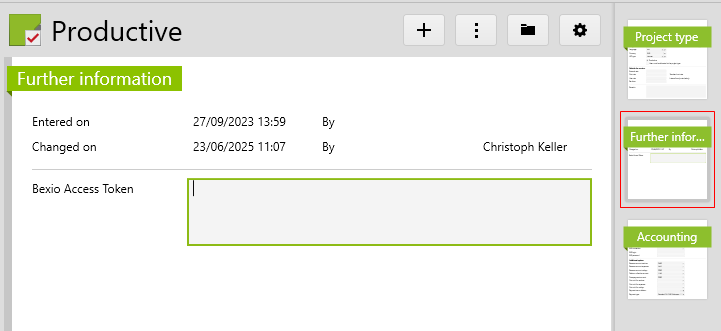
Make sure that the accounts on the Accounting page are set up correctly.
All projects assigned to this project type are posted to this client.
Note: Since the personal account is located on the address (see next section), all projects of a customer must be posted in the same client.
Personal accounts (PK numbers)
Personal account numbers for Bexio are located in Vertec on the address (customer of the project) under Settings.
If the address already exists in Bexio, enter the corresponding PK number here. The address data is updated each time you post
If the address does not yet exist in Bexio, it is automatically created when posting and the personal account number is entered on the address in Vertec.
Only the personal identification numbers on the addresses are considered. Possible overruns on projects are ignored.
Post
In order for invoices to be posted, they must be charged in Vertec.
You can charge and post in one step if the system setting Post invoice directly (System settings > Accounting) is set to Yes.
If you want to post, go to a single invoice or a list of invoices and click in the Actions menu or right-click > Post.
On individual invoices, the posting process can also be triggered on the Accounting page via the Cancel button.
When posting, the addresses or address changes are transferred (see Personal accounts above).
The invoice number from Vertec is transferred as the invoice number (see Deactivate automatic invoice number above).
Cancel
For invoices to be cancelled, they must already be posted.
You can cancel a single invoice or a list of invoices via the Actions menu or right-click > Cancel.
On individual invoices, you can trigger the posting process by going to the Accounting page and clicking the button Cancel.
Depending on the cancellation method set, the invoice is set in Bexio to cancelled or removed from the invoice list (see method description).
Payment import
The payment is imported as described in Payment import with Vertec.