The Vertec Outlook App shows CRM information in Outlook and provides support for daily tasks.
How to operate the Vertec Outlook App is described in the article Outlook App: operation and use.
The Vertec Outlook App is a Vertec Cloud Client and, consequently, runs on the Vertec Cloud Server without local installation. As it is a specialized app, it offers certain functions, but not the full functionality of a full-featured app like the Vertec Web App or Vertec Cloud App.
The Vertec Outlook App enables a tight integration of emails and calendar entries from Outlook into Vertec. The language depends on the logged-in user. Before that, the language of the client computer is used.
The Vertec Outlook App covers the following topics:
The Vertec Outlook App comes in two editions:
The Vertec Outlook App Web Edition: Use this edition if you are deploying Outlook in Office 365 or in your web browser. The Web Edition cannot be used for Outlook as a local Windows client.
Note about the new Outlook for Windows: This is a streamlined Web Outlook, wrapped in a Windows program. Therefore, it basically runs with the Vertec Outlook App Web Edition, with some limitations (currently not possible to open links).
Both installation options are described below.
Installer Download and open the downloaded file (see Outlook Installer section below).
Your Vertec will start automatically. When the following message appears, the Vertec Outlook App installation is completed:

Close.Log in with your Vertec login.
The Outlook App is installed via Outlook installer. It is the same Vertec.OutlookInstaller.exe used to install the Windows Edition locally. The installer can be started with different parameters. For example, an administrator can install the Outlook App with /localmachine for all users of the computer. You can find all the parameters available for the Outlook Installer in the article command line parameters.
As of Vertec 6.8.0.9, an administrator first registers the Vertec Outlook App Web Edition and makes it available in Microsoft Azure. This step is omitted if an earlier Vertec version is used. The exact procedure is explained in the section Add Vertec Outlook App in Azure below.
To use the Vertec Outlook App Web Edition on the clients, users must upload the Vertec Outlook App Web manifest to their Outlook:

manifest.xml):

My add-ins, then + Add a custom add-in and then Add from File...:
manifest.xml.Install.After that, the Vertec Outlook App will be available. Everything about its application can be found in the article Vertec Outlook App: operation and use.
The following Vertec-specific guide is based on the general instructions from Microsoft.
+ New registration.Vertec Outlook App.Multiple Entra ID tenants. Click on Register. The detail window of your newly registered app opens:
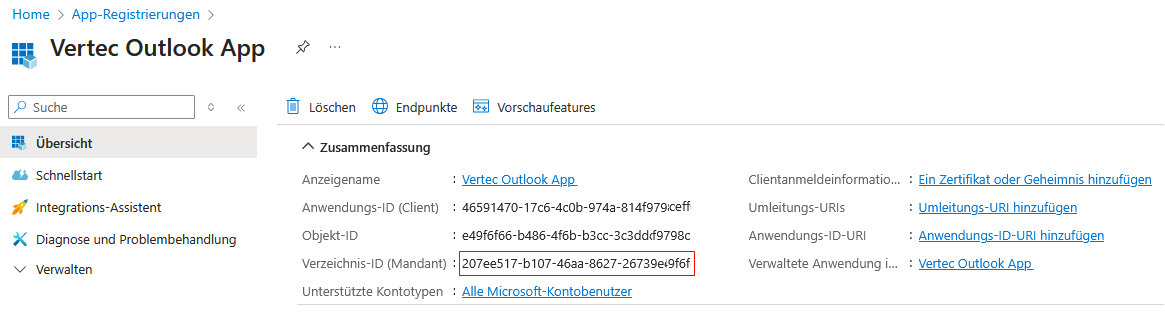
In Vertec, go to system settings > Vertec Apps and define the directory ID (tenant) under Outlook App Web Edition Tenant ID.
Under Manage > Certificates & secrets > Client secrets, click + New client secret.
Enter a description, select the validity period of your key, and then click Add.
The new secret key is created and the value is temporarily shown.
Important: Copy the value of the client secret or save it directly in the Vertec system settings > Vertec Apps under Outlook App Web Edition Client Secret. The key will never be shown again once you leave this area.
In the left pane, select Manage > Expose an API.
Click on the link above Add to generate an application ID URI:
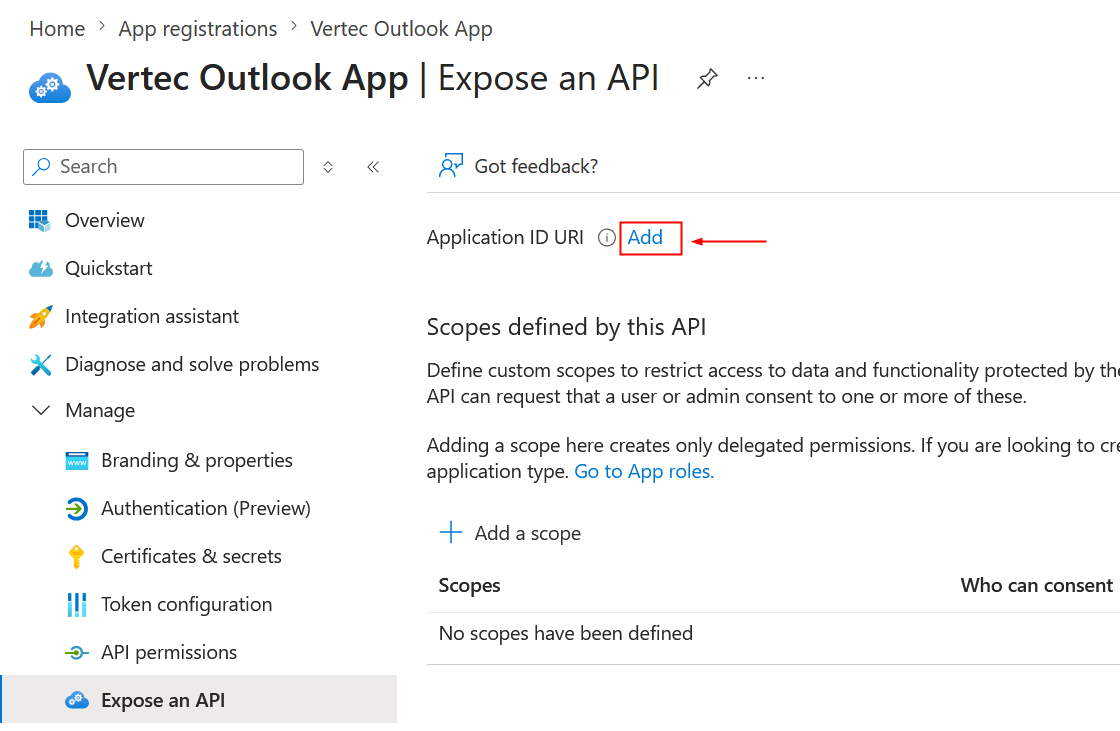
A dialog appears to specify the Application ID URI.
This is shown with a generated application ID URI in the format api://<app-id>.
Add here the URL where the Outlook App of your Vertec instance can be reached, e.g. api://mycompany.vertec-cloud.com/<app-id>. Do not include the outlook parameter from the URL.
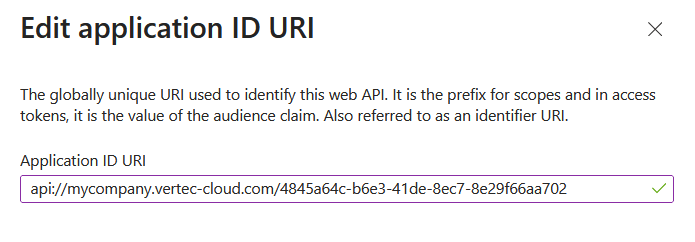
Then click on Save. The dialog closes and the application ID URI is shown at the top.
Define this in the Vertec system settings > Vertec Apps under Outlook App Web Edition ID URI.
Now click on the same page + Add a scope and complete the dialog as follows:
access_as_userAdministratoren und BenutzerRead/write permissions to user files. Read permissions to user mail and profiles. You are free to specify whatever you want here, but you should be able to see later what scope it is. Allow Office to have read/write permissions to all user files and read permissions to all user mail. Office can call the app's web APIs as the current userEnabled.Then click on the button Add scope. The dialog closes and the area is shown in the list.
On the same page, click Add a client application and fill in the values as follows:
ea5a67f6-b6f3-4338-b240-c655ddc3cc8e. Be sure to insert exactly the ID shown here, regardless of your installation. This is the ID of the Microsoft Graph API and is necessary for communication between Microsoft 365 and Vertec Outlook Vertec Outlook App. Click on Add application. The dialog closes and the client application shows in the list.
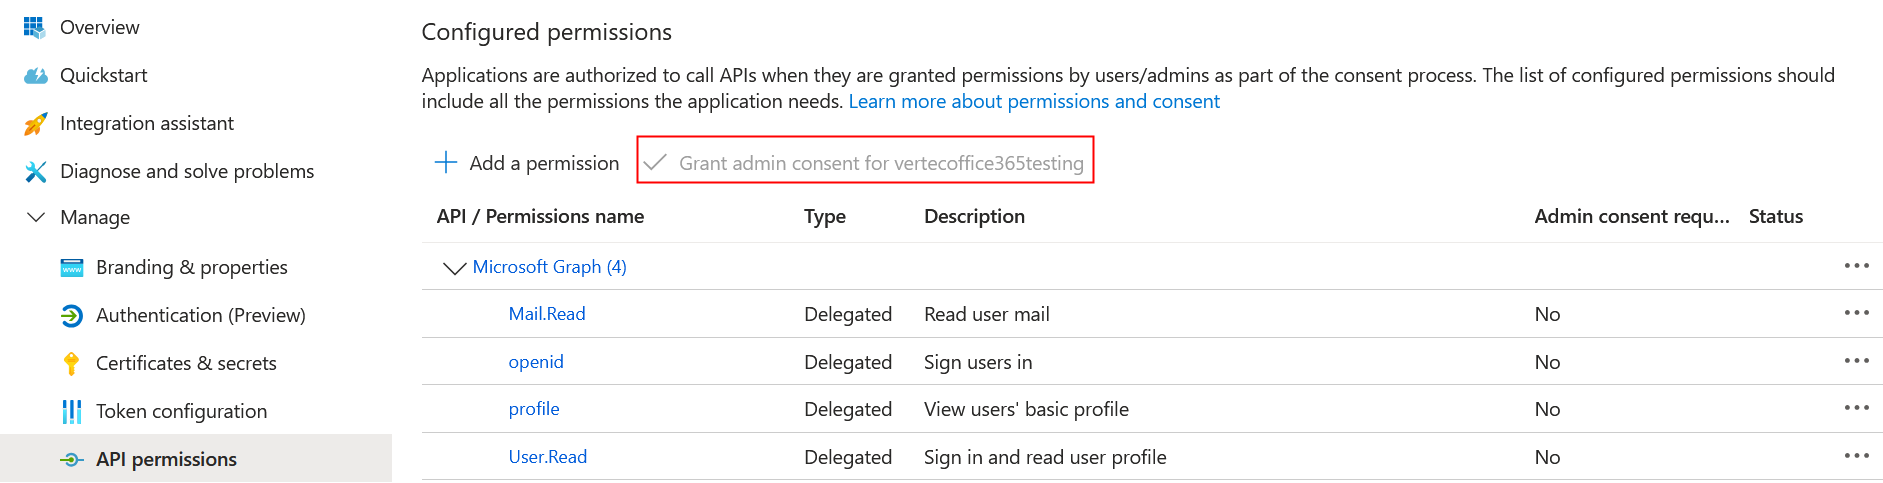
In the left pane, select Manage > API permissions.
Click Add a permission.
Select Microsoft Graph, and then select Delegated permissions.
A list of permissions will appear below. Select the following permissions:
and click Add permissions. The dialog closes and the permissions are listed.
For the functioning operation, the administrator’s consent must be accepted here, as long as a Yes is set in the admin consent required column.
As a file:
The Vertec Outlook App Web Manifest must then be uploaded, just as the users do on the respective clients. To do this, follow the steps described in the Upload Vertec Outlook App Web Manifest section above.
In Azure:
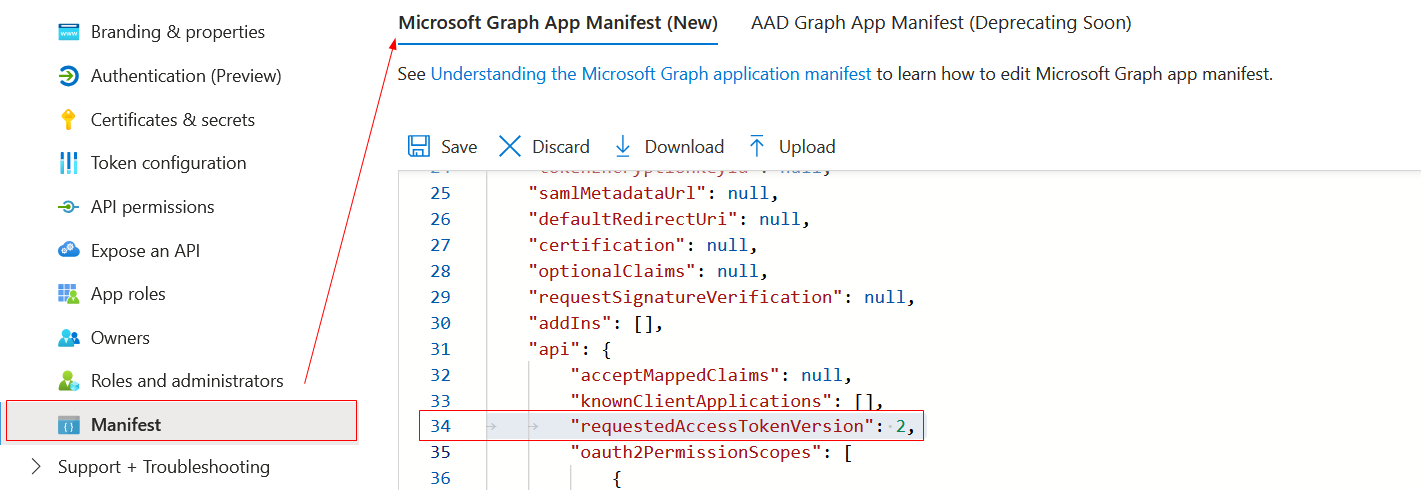
Finally, go to Azure under Manifest > Microsoft Graph App Manifest (New). There, replace the value of requestedAccessTokenVersion from null to 2. If this value is not set, then token validation fails.
The Vertec Outlook App is stored in Azure and can be used as described in the article Outlook App: operation and use.
In the Web Edition, the Vertec Outlook App runs as part of the Web Edition of Outlook, making it a third-party application in the outlook.com application. The Outlook App uses its own cookies for authentication and session management – from the perspective of the browser used, these cookies are “third-party cookies” because they are not sent directly to the main page, but to a third party.
Many browsers have options to restrict the use of such third-party cookies because they are often used for “tracking” (for advertisements). However, if a browser blocks the corresponding cookies from the Outlook App, the Outlook App cannot work, so third-party cookies must be allowed for the outlook.office.com page.
Note: As the Phone App uses the same API, it also has to use the new cookie. Old Phone App versions are not compatible with the new server version. However, new Phone App versions are backwards compatible with old server versions.
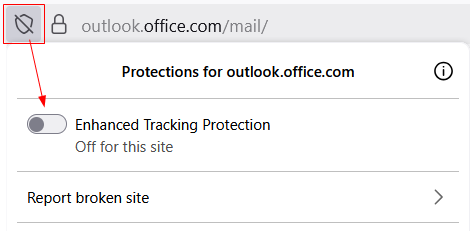
Firefox may experience problems with Outlook App Web Edition. To fix this, try the following:
outlook.office:
In the Outlook App Windows Edition, when moving between monitors with different resolutions, there may be shifts or errors in the display of the Vertec Outlook App.
In Outlook, you can set the Optimize for Compatibility setting via File > Options. This should ensure that the Vertec Outlook App is displayed correctly.
