
How to connect the Vertec MCP server to Microsoft Copilot
 Cloud Suite
 On-Premises
Follow these steps to connect your Vertec mcp server to Microsoft Copilot.
In order to perform the connection, a Microsoft Dataverse must exist. This is provided in the Power Platform Admin Center.
Then log in to your Microsoft Copilot Studio.
Click on the Agent tile. At the top right, click Tools > Add > MCP Server. The following dialog appears:
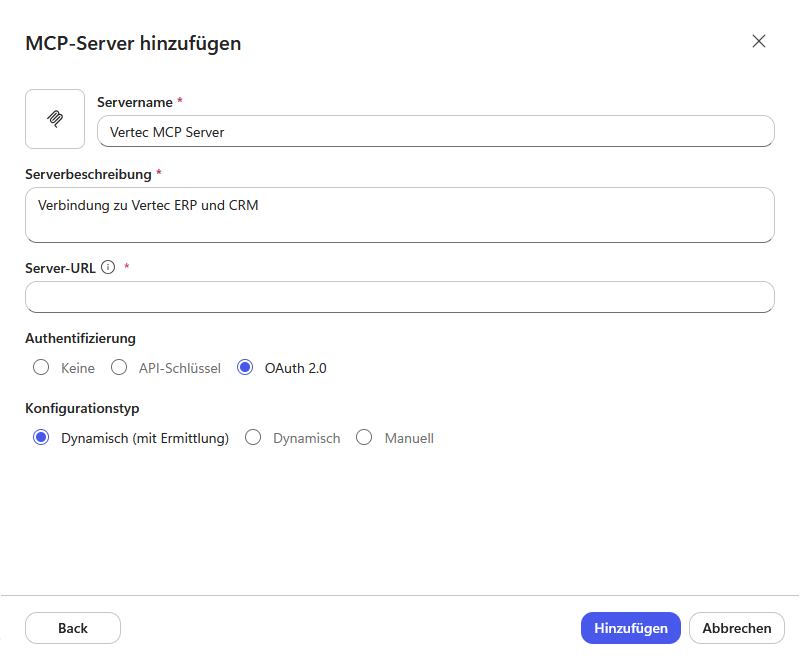
Enter your details here:
Click Add.
The Vertec login window arrives. Here the callback URL can be read. This must be entered in the Vertec system settings at Oauth2 client redirect url.
After that, the agent must be saved and published:
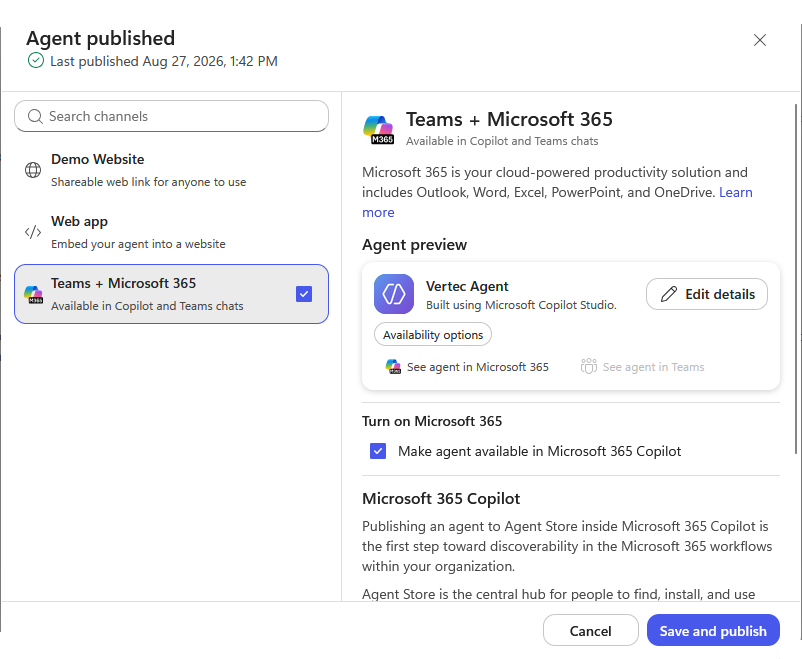
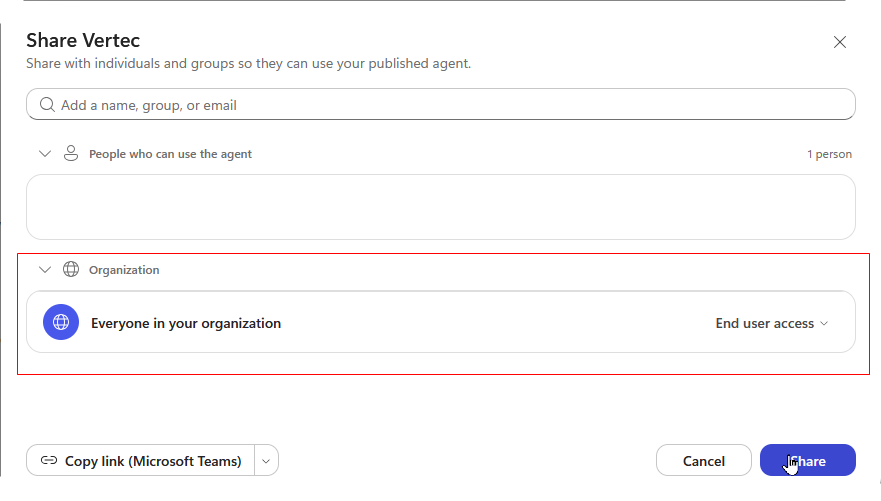
Afterwards, the Vertec MCP server can be addressed in the Copilot Chat.